Bathroom With Cherry Cabinets
Matt is a professional painter and freelance writer, sharing his knowledge, house-painting tips, and product reviews.
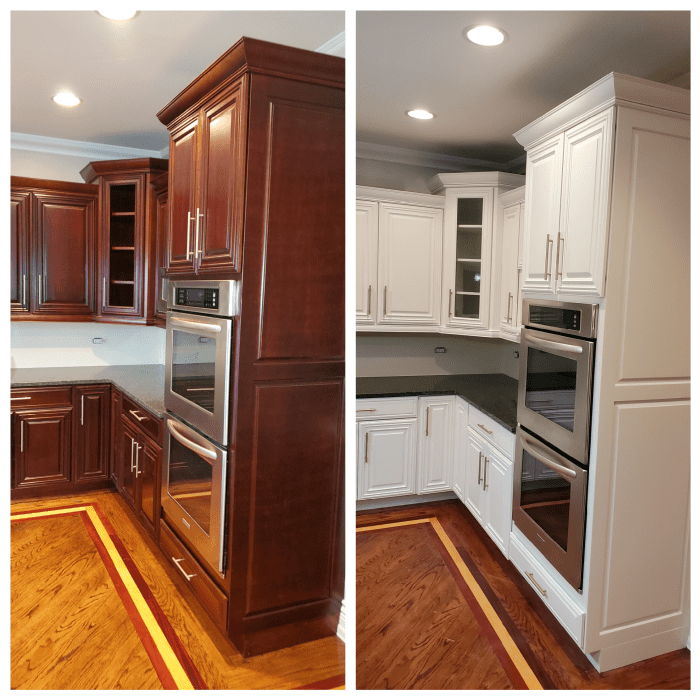
Cherry cabinets I spray painted.
Can You Paint Cherry Wood Cabinets?
If you love everything about your kitchen except your dark red cherry cabinets, you're probably wondering if painting them white is possible, or even a good idea. I've painted cherry cabinets quite a few times for clients and learned a lot along the way. Like maple, cherry has a closed grain and a smooth profile that looks really nice painted, and going from dark red to white brightens up a kitchen immensely.
What to Know Before You Begin
While cherry wood is smooth like maple, there are a couple notable differences to be aware of for paint preparation.
- The surface of the wood does have tiny clusters of pin knots. The small knots are random and difficult to see until the wood is primed white. These natural imperfections are easy to fix though with a little patching and sanding.
- The second factor to be aware of before you prime your cabinets is tannin bleed. Like oak and mahogany, cherry is loaded with tannin, a natural oil that seeps out from the tiny wood pores and knots.
This is why priming correctly is critical when painting cherry cabinets so you don't end up with hideous red swirls all over the doors and frames.
The Best Primer and Paint for Cherry Cabinets
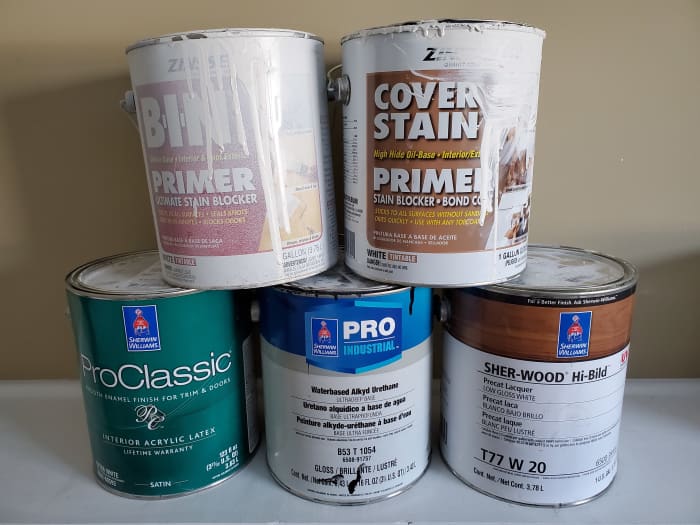
Before I get into the prepping and painting process, I'll go over different coatings options and what I use when I paint cherry cabinets. I started off using acrylic enamel for my cabinet projects before eventually making the switch to white pre-catalyzed lacquer to maximize durability for my clients.
I use the Sherwood Hi-Bild lacquer from Sherwin Williams for most of my cabinet work. This product is for spraying only though, not brushing and rolling, and you must have a well ventilated work space when spraying lacquer. For chemical resistance and hardness, pre-cat lacquer is awesome, and the finish is glassy smooth.
Use Self-Leveling Acrylic Alkyd Enamel
A good option for brushing and rolling cherry cabinets, or spraying, is acrylic enamel, or acrylic alkyd enamel. I've used the acrylic Pro Classic enamel from Sherwin Williams multiple times to paint trim and wood cabinets, including cherry. I have also sprayed the alkyd version of this product too.
Keep in mind that kitchen cabinets take a lot of abuse, and while water-based enamel is certainly washable, you do have to be more gentle when it comes to wiping them and exposing the paint to chemicals. That is one of the reasons I started using lacquer.
When painting cherry with enamel, it's important to use a product that levels nicely to get that super smooth finish on your cabinet doors. I would use a high quality acrylic alkyd enamel on your cabinets. These dry harder and level out nicely too when brushed and sprayed. I've had very good results using Pro Industrial water-based alkyd urethane enamel to spray paint cabinets black once. I also used the same product to paint a staircase black and white.
Read More From Dengarden
Use Solvent-Based Primer
Like I mentioned earlier, cherry wood discharges wood tannin that is reddish in color. The tannin bleed into white paint and ruin the finish without priming a seal coat first. The only way to stop the red tannin from bleeding into paint is with one to two coats of solvent-based primer, such as oil primer, or shellac primer.
Do not use latex primer on stained cherry cabinets. I have yet to find water-based primer that will hold back wood tannin. An excellent product to use on your cabinets is the oil primer Cover Stain, or the shellac primer BIN. Either one would be fine.
Prepping Your Cabinets for Paint
The paint preparation for cherry is almost exactly the same as the paint prep for maple and other types of wood with a closed grain. Fortunately, you don't have to do any grain filling, but cleaning and sanding, or liquid de-glossing, is essential before priming.
My process for kitchen cabinet paint prep starts with removing and labeling the doors and drawer fronts, cleaning, sanding, patching wood damage, and spraying two coats each of primer and my top coats.
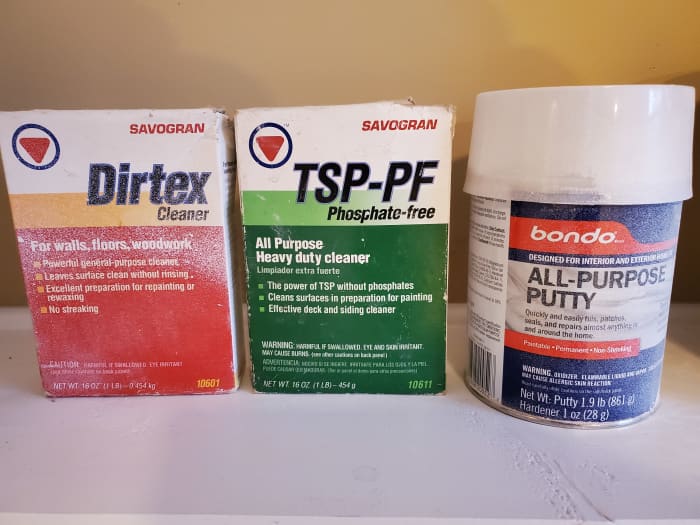
- Clean: Remove the cabinet doors and clean them with a pre-paint cleaner like TSP, or Dirtex powder. Either one works good. The cabinet doors above the stove and microwave usually need some extra attention. Those small crevices on the decorative parts of the door fronts tend to collect cooking grease. Make sure you wash off every bit of grease otherwise the paint will crack and lift from the surface.
- Sand: Cherry sands easily, but you can also deform the wood from sanding too hard, or using the wrong sandpaper grit. Don't use sandpaper any coarser than 150-grit. I often use 220-grit before primer and 320-grit between coats to prevent scratches.
- Patch the pin knots: The first time I painted cherry I didn't even know there were small pin knots in the wood until I primed them white. Be prepared to go back and patch small holes in the wood after you prime. These are easy to fix with Bondo wood filler. Use a putty knife to fill the holes.
- Cover the floor and countertops. The masking for brushing and rolling cabinet frames is easy. All you have to do is cover the floor with drop cloths and the countertop with plastic, but for spraying, there is more masking involved to protect appliances and walls from over-spray. Use the 3M hand masker to make that process easier.
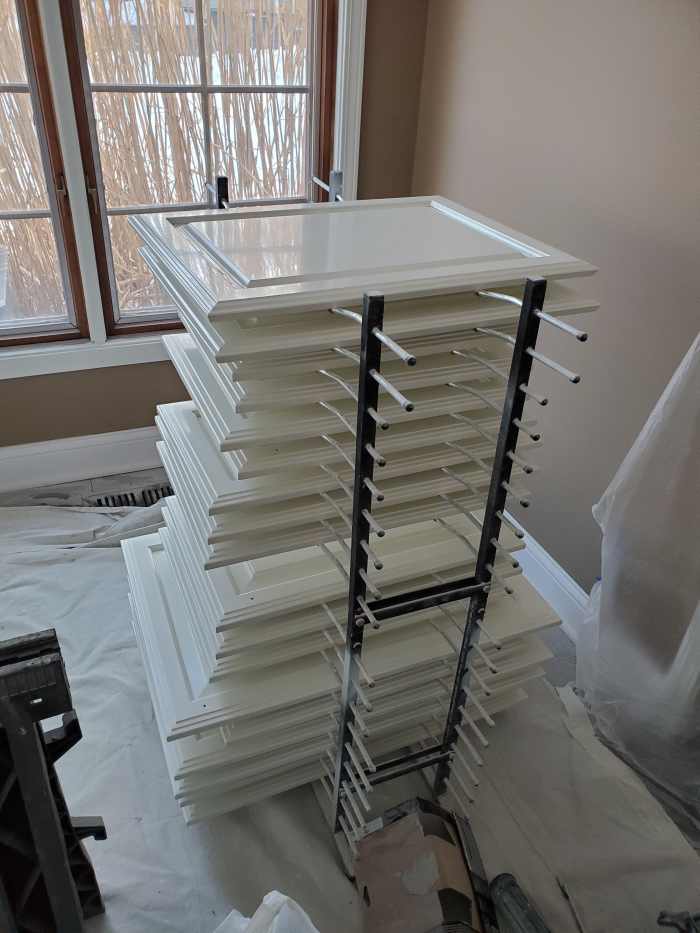
Cherry doors I sprayed with white pre-catalyzed lacquer.
Prime and Paint Your Cherry Cabinets
Apply two coats each of primer and paint. Two coats of primer is important for helping the paint cover better over the dark red color of the stain. A third coat of paint might be needed if you brush and roll because the coverage isn't as good as using a sprayer. Spraying lays down a thicker and more even coat.
If you have room in a ventilated garage to spray, I definitely recommend spray painting your cherry cabinets instead of rolling them, at least for the doors and drawer fronts. The finish looks so much better than the brush and roller stippling you get when you roll. Brushing and rolling takes forever too.
The best paint sprayer to use for spraying doors quickly is an airless and a fine finish spray tip. I use a Graco GX-19 Finish Pro to spray cabinet doors, using a Graco fine finish spray tip. Painted doors have to be stored somewhere for drying. You can lay them on buckets, but I use a professional drying rack, which is featured in the photo.
For strictly brushing and rolling, don't use a paint roller with nap thicker than 1/4-inch. A paint roller 4-inches in length is good. Use an angled 2-inch brush for cutting-in and brushing recessed panels. One side of each door must be painted and allowed to fully dry before flipping over to paint the other side.
This content is accurate and true to the best of the author's knowledge and is not meant to substitute for formal and individualized advice from a qualified professional.
© 2021 Matt G.
Source: https://dengarden.com/home-improvement/Tips-for-Painting-Cherry-Cabinets-White
